Installing the printer on a wireless network (Macintosh)
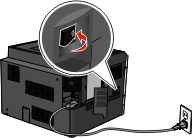
Make sure to disconnect the Ethernet cable when installing the printer on a wireless network.
Prepare to configure the printer
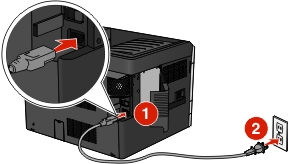
Connect the power cable to the printer and then to a properly grounded electrical outlet, and then turn the printer on.
Locate the printer MAC address.
From the home screen, navigate to:
 > Reports > Network Setup Page
In the Standard Network Card section, look for UAA (MAC).
| Note: You will need this information later. |
Enter the printer information
Access the AirPort options:
In Mac OS X version 10.5 or later
From the Apple menu, navigate to:
System Preferences > Network > AirPort
In Mac OS X version 10.4 or earlier
From the Finder, navigate to:
Applications > Internet Connect > AirPort
From the Network Name pop-up menu, select print server [yyyyyy], where the y's are the last six digits of the MAC address located on the MAC address sheet.
Open a Web browser.
From the Bookmarks menu, select Show or Show All Bookmarks.
Under COLLECTIONS, select Bonjour or Rendezvous, and then double-click the printer name.
| Note: The application referred to as Rendezvous in Mac OS X version 10.2 is now called Bonjour by Apple Inc. |
From the Embedded Web Server, navigate to where the wireless settings information are stored.
Configure the printer for wireless access
Type the network name (SSID) in the appropriate field.
Select Infrastructure as your Network Mode setting if you are using an access point (wireless router).
Select the type of security you want to use to protect your wireless network.
Enter the security information necessary for the printer to connect to the wireless network.
Click Submit.
Open the AirPort application on your computer:
In Mac OS X version 10.5 or later
From the Apple menu, navigate to:
System Preferences > Network > AirPort
In Mac OS X version 10.4 or earlier
From the Finder, navigate to:
Applications > Internet Connect > AirPort
From the Network pop-up menu, select the name of your wireless network.
Configure your computer to use the printer wirelessly
To print on a network printer, each Macintosh user must install a custom printer driver file and create a print queue in the Printer Setup Utility or Print Center.
Install a printer driver file on the computer:
Insert the Software and Documentation CD, and then double-click the installer package for the printer.
Follow the instructions on the computer screen.
Select a destination, and then click Continue.
From the Easy Install screen, click Install.
Type the user password, and then click OK.
All necessary applications are installed in the computer.
Click Close when installation is complete.
Add the printer:
For IP printing:
In Mac OS X version 10.5 or later
From the Apple menu, navigate to:
System Preferences > Print & Fax
Click +, and then click the IP tab.
Type the IP address of the printer in the address field, and then click Add.
In Mac OS X version 10.4 or earlier
From the Finder, navigate to:
Applications > Utilities
Double-click Printer Setup Utility or Print Center.
From the Printer List, choose Add, and then click IP Printer.
Type the IP address of the printer in the address field, and then click Add.
For AppleTalk printing:
| Note: Make sure AppleTalk is activated on your printer. |
In Mac OS X version 10.5
From the Apple menu, navigate to:
System Preferences > Print & Fax
Click +, and then navigate to:
AppleTalk > select the printer from the list > Add
In Mac OS X version 10.4 or earlier
From the Finder, navigate to:
Applications > Utilities
Double-click Printer Setup Utility or Print Center.
From the Printer List, click Add.
Click Default Browser tab > More Printers.
From the first pop-up menu, select AppleTalk.
From the second pop-up menu, select Local AppleTalk Zone.
Select the printer from the list, and then click Add.
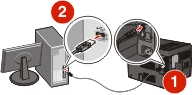
 Make sure the printer and computer are fully on and ready.
 Do not connect the USB cable until instructed to do so on the computer screen.